Crystal Reports for Acumatica — Help Center
Adding Parameters to Your Reports for Dynamic Filtering
Parameters transform a static report into a dynamic tool. Instead of creating separate reports for each month, vendor, or date range, you can build a single report that users customize at runtime by selecting filters. This flexibility reduces report clutter, simplifies maintenance, and gives finance teams the control they need to answer specific business questions instantly. Learning to add and configure parameters is one of the most practical skills you can develop in AstraReports.
What Parameters Do
A parameter is a placeholder that prompts the user to supply a value before the report runs. When someone clicks “Preview Report,” they first see a dialog asking them to select or enter parameter values. The report then generates using only the data matching those selections. If you’re building a sales summary report, you might create parameters for Date Range and Salesperson—when users run the report, they choose the timeframe and salesperson they’re interested in, and the report shows only relevant data.
Parameters serve multiple purposes: they reduce clutter by letting users focus on data that matters to them, they allow the same report template to serve different business needs, and they enable scheduled report delivery with specific filters applied automatically. A controller might schedule a weekly vendor payment report with a parameter automatically set to “Unpaid Invoices,” eliminating the need to manually filter each week.
Static vs. Dynamic Parameters
AstraReports supports two types of parameters: static and dynamic. A static parameter presents a fixed list of options that you define when building the report. For example, you might create a static Department parameter with options like “Sales,” “Marketing,” “Finance,” and “Operations.” These values don’t change unless you edit the report itself.
A dynamic parameter draws its values from your dataset in real time. If you create a dynamic OrderNumber parameter, it automatically displays every order number available in your Acumatica system (or a filtered subset). The advantage is that new orders added to Acumatica automatically become available in the parameter list—you don’t need to maintain a static list manually.
[Image: Parameter configuration interface showing setup options and field selection]
Most finance and accounting reports use dynamic parameters because your data is constantly changing. A dynamic parameter for vendors, for instance, pulls directly from your AP module and reflects any new vendors you’ve added.
Adding Parameters in the Parameters Tab
To add a parameter, navigate to the PARAMETERS tab in your AstraReports report. Click the button to create a new parameter, and you’ll see a form asking for basic information: the parameter name, a display label (what users see), and the data type (typically Text, Number, or Date).
Next, you’ll specify whether the parameter is static or dynamic. For static parameters, you simply enter the available options. For dynamic parameters, you select a field from your dataset—this tells AstraReports to populate the parameter list from that field’s values.
Consider a purchase order report. You might add a parameter called “OrderNumber” with a display label of “Select Order(s).” If you make this a dynamic parameter linked to the OrderNumber field in your PO.POOrder dataset, it will automatically show every order number in your system. When a user runs the report, they’ll see a dropdown (or searchable list) populated with actual order numbers.
Range vs. Discrete Value Parameters
When configuring dynamic parameters, you’ll need to decide whether users should select a single value or a range. A discrete value parameter requires users to select specific items: “Show me data for vendor ABC123” or “Include only high-priority orders.” A range parameter lets users specify a start and end point, typically used for dates: “Show me transactions from January 1 to March 31.”
For a date parameter, range is almost always the right choice—users naturally think in terms of date ranges. For categorical data like vendors or departments, discrete values usually make more sense. However, AstraReports is flexible: you can configure a parameter to allow multiple selections, so users might choose vendors ABC123, XYZ789, and another vendor simultaneously, and the report includes data for all three.
[Image: Parameters section in Preview Report showing range and discrete value options]
A Practical Example: Order Number Parameter
Let’s walk through a concrete example. You’re building a detailed purchase order report for your procurement team. You want users to be able to run the report for specific orders rather than seeing every order in the system. You’d add an OrderNumber parameter:
- In the PARAMETERS tab, click “New Parameter”
- Name it “OrderNumber” with display label “Select Order(s)”
- Set data type to Text
- Choose Dynamic and select the OrderNumber field from PO.POOrder table
- Allow multiple selections so users can compare orders
- Save
Now, when someone runs your purchase order report, they’ll see a parameter prompt asking them to select one or more orders. They might choose “SC-000001,” “SC-000003,” and “SC-000005.” The report will generate showing only those three orders with all their details and line items.
Parameters in the Preview Report Dialog
When a user clicks “Preview Report,” any parameters you’ve configured appear in the dialog before the report generates. If you’ve made a parameter required, users can’t proceed without selecting a value. If you’ve made a parameter optional, users can leave it blank, and the report shows all data (unfiltered). This flexibility is valuable for broad reports where some users want to filter and others want the full view.
The preview dialog respects your parameter configuration. If you’ve set a range parameter for dates, the dialog shows date pickers. If you’ve set a discrete value parameter with a limited list, it might show checkboxes or a dropdown depending on the number of options and your AstraReports settings.
Using Parameters in Report Formulas
Once you’ve created parameters, you can reference them in Crystal Reports calculations and filters. If you’re designing the actual report layout (after downloading the .RPT template), you can create formulas that use parameter values. For instance, you might add a text field showing “Report generated for orders: [OrderNumber parameter]” at the top of the report. This personalizes the report and reminds users what filters they applied.
Attaching Parameters to Email Templates
One powerful feature of AstraReports is the ability to schedule reports and have them sent automatically via email. When you set up a scheduled report, you can pre-fill parameters with specific values. For example, you might schedule a weekly vendor aging report to run every Friday with the “Days Overdue” parameter automatically set to “>30 days.” The report recipient gets exactly the data they need without taking any action—no parameter dialog appears.
This automation is transformative for finance teams. You can set up a scheduled report that emails the CFO every Monday morning showing the current week’s cash position, a report for the AP manager showing invoices due this week, and a report for the controller showing budget variance exceeding 10%. Each runs automatically with its parameters pre-configured.
Best Practices for Parameter Design
Keep parameter names clear and user-friendly. Instead of “PONum,” use “Order Number.” Instead of “VendID,” use “Vendor Name.” Your report might be used by people who don’t know Acumatica’s database terminology.
Make parameters required only when necessary. If a parameter is genuinely optional (your report makes sense whether it’s filtered or not), mark it as optional. This reduces friction for users who want the full dataset.
Order your parameters logically. If a report has multiple parameters, arrange them in the order users typically think about the data. For a sales report, users usually filter by date range first, then by salesperson—so put the date parameter before the salesperson parameter.
Test parameters thoroughly before sharing your report. Run the preview dialog, select different parameter values, and confirm the report generates correctly with each combination. Parameters are easy to understand but easy to configure incorrectly, and testing catches mistakes early.
Troubleshooting Parameter Issues
If a dynamic parameter shows no values, check that your dataset is configured correctly and includes the field you’ve referenced. If a range parameter isn’t filtering data as expected, verify that your Crystal Reports formulas are correctly referencing the parameter values. If users are confused by parameter options, consider simplifying your parameter list or adding descriptive help text.
Parameters are powerful tools that separate basic reports from sophisticated, user-friendly analysis tools. Mastering them will significantly enhance your value as an AstraReports designer and give your organization the flexibility to answer business questions without waiting for IT to build new reports.
Step-by-Step: Every Parameter Type AstraReports Supports
AstraReports supports nearly every parameter type that SAP Crystal Reports exposes. The only one the integration does not handle is the Currency type—use Number with formatting instead. Below is the full breakdown of what each parameter type does, which options are honored, and what the configuration looks like.
Number Parameters
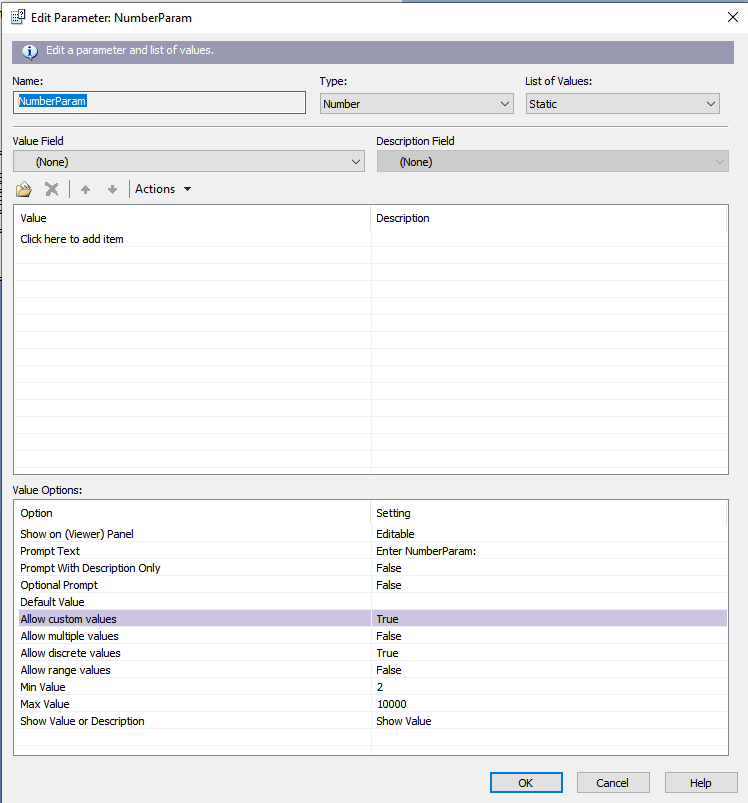
For Number parameters, AstraReports honors most of the standard Crystal Reports options:
- Show on (Viewer) Panel — Ignored. Parameters always show in Acumatica.
- Prompt Text — Synchronized with Acumatica and used as the parameter name.
- Prompt With Description Only — Used for parameters that require a list.
- Optional Prompt — Not used.
- Default Value — Not used.
- Allow Custom Values — Not used (always true).
- Allow Multiple Values — Synchronized with lists.
- Allow Discrete Values — Not used.
- Allow Range Values — Synchronized (can be combined with Allow Multiple Values).
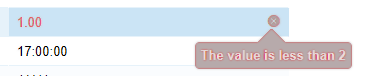
- Min Value / Max Value — Synchronized with dates and numbers. If a user enters a value outside the configured range, Acumatica raises a validation error.

- Show Value or Description — Not used.
Boolean Parameters
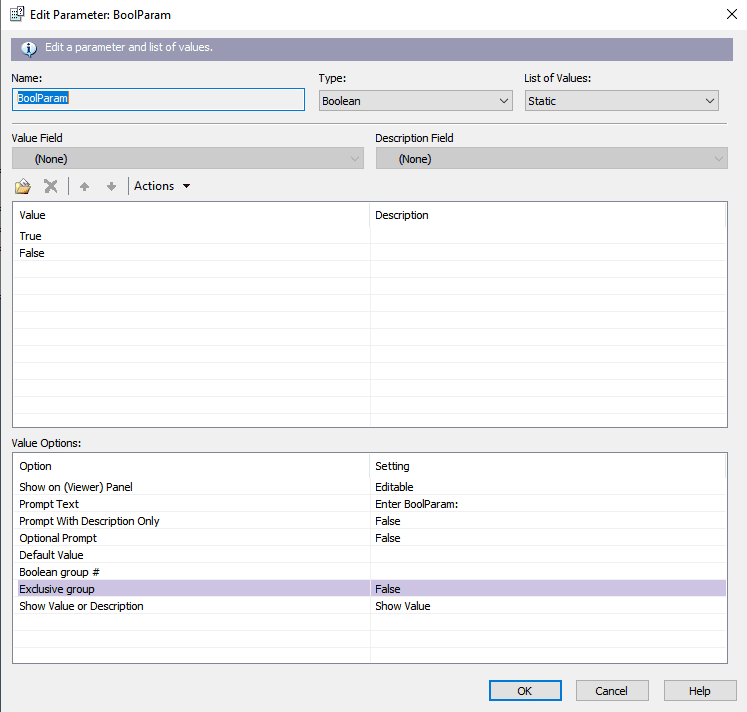
For Boolean parameters, the Boolean group and Exclusive group options are both ignored by the integration. Use a simple True/False parameter when you need a yes/no filter.
Dynamic Parameters
Dynamic parameters are where the integration shines, because they let users pick from a live list of values pulled directly from Acumatica.
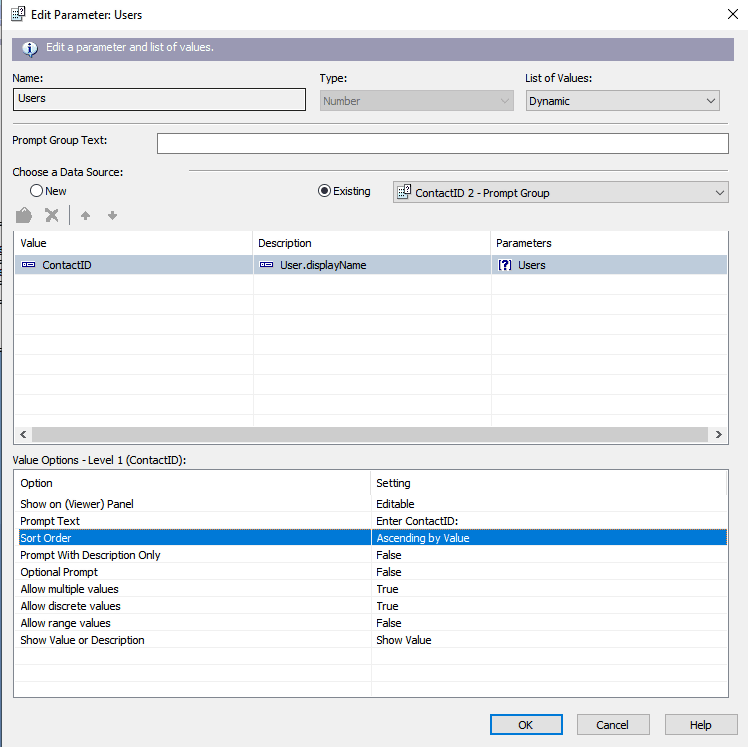
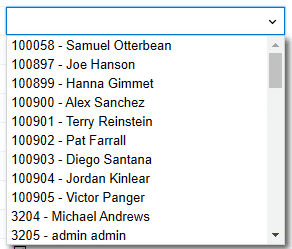
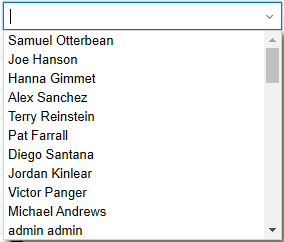
In the example above, the parameter’s value comes from ContactID and the human-readable descriptor comes from User.displayName. The user sees the friendly name; the report receives the technical ID.
- Sort Order — Controls how values are sorted in the dropdown.
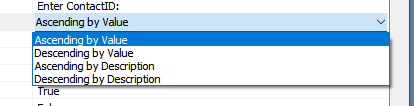
- Prompt With Description Only — When checked, the dropdown shows just the description. When unchecked, the dropdown shows
value – description.
- Allow Multiple Values — Enables multi-select on the dropdown.

- Allow Range Values — Enables range filtering. It can be combined with Allow Multiple Values for parameters that accept either discrete picks or whole ranges.

Range Syntax Cheat Sheet
When users type a range manually, AstraReports supports the standard mathematical bracket syntax:
[or]— value is included in the range(or)— value is excluded from the range
Examples:
[1..2]— greater than or equal to 1 but less than or equal to 2 (2 ≥ x ≥ 1)[1..3)— greater than or equal to 1 but less than 3 (3 > x ≥ 1)(5..10)— greater than 5 but less than 10 (10 > x > 5)(10..)— greater than 10[5..)— greater than or equal to 5(..20]— less than or equal to 20(..30)— less than 30
For users who prefer a guided form rather than typing brackets, the Set Range button in Acumatica opens a dialog.
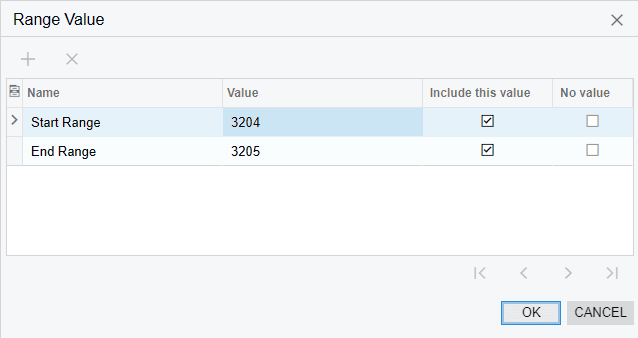
For multi-range filters, the same dialog produces compact output such as (..3233],[3235..)—everything except the value 3234.
![Set Range form configured for multiple ranges, shown in Acumatica as (..3233],3235..)